Tuesday 10 December 2013

A Great DIY Gift to Include the Kids On

I have been scouring the internet for gifts that would inspire both the kids, and the recipients, and I think I finally found it.  And it was amazingly simple to get ready, and almost free, so you really can't beat that!

I had been reading online about "Gratitude" and "Joy" jars.  All you needed was a jar of some sort, embellishments for said jar, and paper.  Well, I just happened to have all of those supplies on hand, so one day last week, we "worked" on our creativity and motor skills, while making presents for family.

Here is what we did:


I washed out some of our peanut butter jars and gave them to the kids.  I had envisioned beautifully decorated glass, but thought maybe plastic was a better idea for kids who like to see how things bounce...


Then I gave them the stickers that keep coming in the mail from the Disney movie club.  We still haven't signed up, but I won't say no to free stickers!


Each kid got their own jar to decorate, and a full sheet of stickers.


And started their own masterpiece!


Little Dude got an airplane that morning from Grandma and Grandpa, so he finished his project ASAP!


I cut 11 pieces of 12" x 12" scrapbook papers into 2" x 2" squares for each jar (22 pages all together).


After they were finished, I put instructions in for each family to write something at the end of the day, be it a great memory, or something they were thankful for.  Then next Christmas, they have a daily scrapbook of the last year.  And reasons to look for great moments!

I Did NOT Fall off the Planet

I've just been hibernating.  You would probably think with the miserable weather we've been having here (-30 last week), I would have nothing but time to do crafts and then post about it.  And you'd be half right.  We've been doing lots of stuff with the kids.  Even taking pictures.  Then spending my evenings cuddling on the couch with my Hubby rather than telling you all about it.

He's working tonight, so here's a little catch up...


I found this great double sided puzzle at a local second hand store.  The kids played with it for an entire afternoon.  I think Little Dude just loved at the different cars and buses on it, but either way, he still played with it.


It was $1.00 for an afternoon of fun.  Not bad!


This is what the puzzle was.  ^


Little Dude's birthday cake.  I swear he really did get to taste some of it, not just wear it all!


And Sweetie's matching smile!


And then we did these Q-tip painting activities this afternoon.


The idea was to use the Q-tip to stamp in the circles on the letters.


He was way more interested in what the paint felt like, and tasted like.  Maybe we'll call this one a science experiment instead... :)


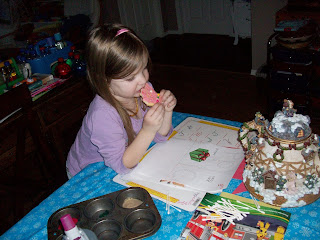
Sweetie made sure to savour her cookie before working on her sheets!

And there you are.  We haven't done anything amazingly photo worthy the last week, just made sure to cherish the extra family time we were given.  Stay tuned for more!

Tuesday 26 November 2013

Elijah

Today we read the story of Elijah and the prophets of Baal.  I found this great printable to read to the kids, and then they could add their own pictures to tell what they remembered from the story.


Then Sweetie has apparently gotten too big for simple colouring activities, and instead wanted to play with playdough.

It was a pretty simple day today, since I really wasn't having luck with anything.  I tried making bread this morning, but the first batch didn't rise and somewhat resembled...well...not bread.

So I opened a brand new package of yeast, and tried the bread machine this time.  Except after the first 30 minutes, my machine started to smoke and smell like burnt plastic.  It is now sitting outside.  After this morning's expeditions, I decided to keep school pretty simple for my own safety!

Friday 22 November 2013

What Would I Do?

I so love this question.  What would I do if I was unrestricted as to money and abilities?

Of course, I would pay off all my bills and all those boring things.  And then I would live out the dream that my husband have had since we started dating.  I would take my family to poverty stricken areas of the world, and my kids would learn about what is happening in our world firsthand.

And I can't even imagine the differences we could make if funds were truly unlimited.  We could install all the clean water systems that would be needed.  We could cloth, feed, educate and love on all of those children who so desperately need it.  And my kids could learn that they can make a difference, no matter what. 

My passion (and one of those nifty gifts from God) is to give to other people.  I do this on a small scale at home, and my kids are involved to whatever degree they can be.  We donate to our local SPCA, food banks, OCC boxes, and angels from Christmas trees at local businesses.  And we intend to make volunteering more focal in our lives as the kids get older (they are 3.5 and 2 right now).  But unlimited funds?  I can't even imagine.

What gifts has God given you?  What would your dream be?  I would love to hear from you.  And if you have a prayer that you would like me to lift up to God for you, I would be honored! 

I would love to hear from you!  Have a blessed weekend ladies!

Foam Castles

Well, my love affair with Dollarama continues...  We are doing a royalty theme this week, and I found these cute foam sticker castle sets for $0.50.  That's $0.25 per kid!!!

Here they are:


Sweetie was thrilled that she didn't have to colour anything today!


Little Dude really couldn't have cared less, so Mommy did most of his project.  But he did come along at the end and put a couple of his stickers on.


I promise, her head really is attached!  And she is saying "Cheese" behind the foam!


Little Dude spent most of his time driving around our school cart.  Motor skills, right?


Paper Plate Drum

Here is a craft that is SOOOO easy to do.  I doubled up on some paper plates for the kids, let them colour the outsides, then we made drums out of them.


Simple paper plates.


A case of crayons.


Two smiling kids.


Some plastic pony beads.


A cheap stapler.


And TADA!!! We have drums.


And the castles we made earlier this week.


Tuesday 19 November 2013

We Did It!!! (Kinda)

It has been a long two weeks at our house with two very sick children under the age of 4.  This means that schoolwork has been pushed to the side in favour of lots of cuddle time (and blowing noses, and medications and rubs...)

But yesterday, we did it!!! Kinda.  We at least managed to read the bible story of David as King, then talk about how God can use anybody to do amazing things.

Then we finished off our Operation Christmas Child boxes (all 7 of them!).  Have I mentioned that I like to shop?  And that I passed that beautiful habit along to my daughter?  Oops.


My poor, pale faced little Sweetie


Little Dude was NOT happy yesterday.  At all. 


Not even his usual "Cheese" smiley face for the camera.


We coloured pictures to include in the boxes.  Then the kids went back to the couch to watch Magic Schoolbus.  At least we accomplished a little.


Not to deliver our treasures!

Thursday 14 November 2013

DIY Inspirational Wreath

So I have been seeing this cool wreath on Facebook a LOT lately.  It is made from an old hymn book, and they cut the pages to look like leaves, and made a wreath.


I thought that was such a beautiful idea, and pretty much left it at that.  Then one day, I was back at my favourite place ever...you guessed it! Dollarama!  Not really my favourite place, but they sure do know me there.  Anyways, I found this neat sparkly garland there, and an idea started to form in my head.


I thought that I could make a neat wreath with my "garland" (it came packaged like this) and make my own version of an inspirational wreath.  So, I printed out the key words from Phillipians 4:8. 


"Finally, brothers, whatever is true, whatever is honorable, whatever is just, whatever is pure, whatever is lovely, whatever is commendable, if there is any excellence, if there is anything worthy of praise, think about these things."

I printed them out on cardstock, then used my 1" circle punch to cut them out.  Then, to make them all sparkly too, I brushed on some glitter glue that I had.


I hot glued some buttons onto the back of them to make them a little stiffer, and easier to glue onto my wreath.


 After doing mine, I would recommend that you choose buttons the same size as your cut-outs.


I tried to glue them on evenly.


It didn't work.  But that's okay, since I glued them onto the wires, it was easy enough to move them around to look more even.


And here it is!

I used:
1 sheet of white cardstock
10 buttons
1" circle punch
Glitter glue
Paint brush
Hot glue
Garland ($2)


Antique Window Turned Jewellery Display

I have been working on this one for awhile, but I FINALLY got around to hanging it up and actually putting stuff onto it, so here we go...

I have used these same type of frames for the kids' art displays, but I had imagined this one as my art supplies.  Since my drawings tend to run to the stick bird kind, I thought maybe I could put up my handmade jewellery on here, and display some family photos and inspirational sayings at the same time.

I started out by sanding down the frame, than painting with a white semi-gloss paint that is meant to seal all the old stuff out. 

I measured the back to put a hanger in the middle.


I actually measured right too!  This is definitely not a strong suit of mine, so I'm pretty impressed with myself!


I used clear 3M hooks for my holders, since I didn't want to put any more holes in the frame than I had to.


The hooks on the bottom are actually small cable holders, so they work perfectly for my handmade bracelets.


I still don't have all of my pictures on it, but this gives you a better idea of what it will look like.