These are my tools to create a free "new to us" project. The table was my find, the piece of pine was an old shelf from my son's armoire that I knew I would one day find a use for. So far, it's all free!
The table was originally covered with vinyl when I picked it up. Above you can see what it looked like when I removed the vinyl.
The MDF underneath had gotten wet (hence the vinyl I am guessing), so I had to replace the top.
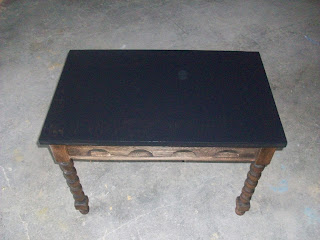
I removed the screws holding on the top, then, sand down the old shelf to put it on top. Then, as mentioned before, I got my handy hubby to cut it for me (it turns out that square is important too!).
And here is the table before I put on the chalkboard paint.
Here is a link if you want to get some yourself:
I took this picture before actually applying the paint. I used the foam brush at the beginning, but switched over to a roller to get the finish I wanted. The brush left too many stroke marks.
Here is the table after one coat of paint. You can see at the bottom of the black that you can still see through it. The label says to coat with at least 2 coats of paint, and I ended up using 3.
And here is the finished product:
I realized that the sidewalk chalk that we have got absolutely drenched last night during the thunder storm, so have not gotten to write a message on it yet. Hopefully I can later today or tomorrow if it dries out quickly enough!


No comments:
Post a Comment